
Note: this is part one of the Hermit Tutorial
There are at least two methods to do this, one is:
- Select the front camera
- In the attributes of the frontShape find the Environment section

- Click on the Create button after Image Plane
Note: Instruction video at bottom of page
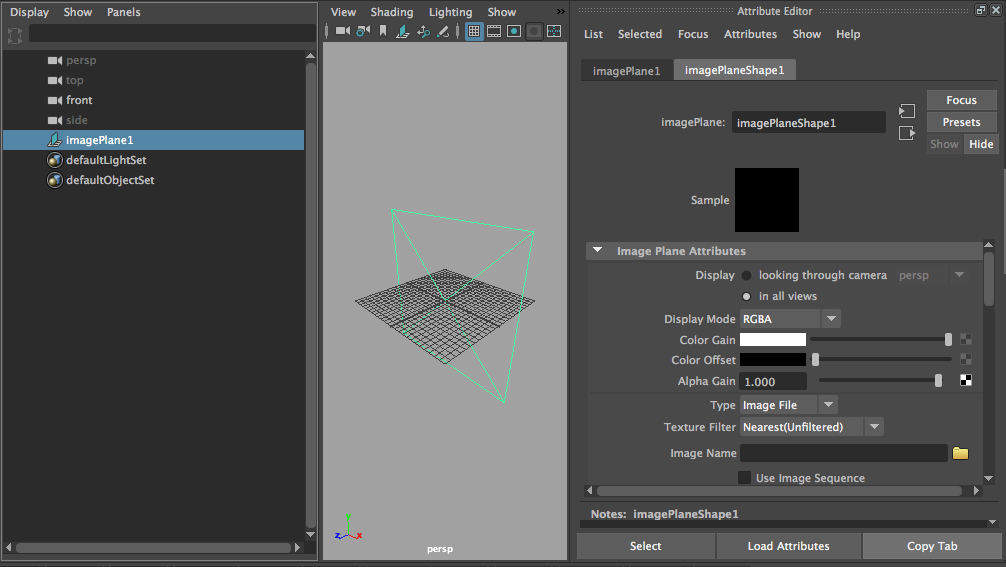
- In the Image Plane Attributes of the imagePlaneShape1 that pops up, click on the folder icon after the Image Name field to bring up the file browser. Find the front image and load it
- If you need to go back to these properties: Select the camera, find the Environment > Image Plane and click on the arrow at the end of that line.
- You can also click on the add image plane icon on the panel toolbar of the view you want the image to be in (front view) and directly select the image file in the browser that pops op
- Repeat for side and top camera. Since the image are all the same size they should align:
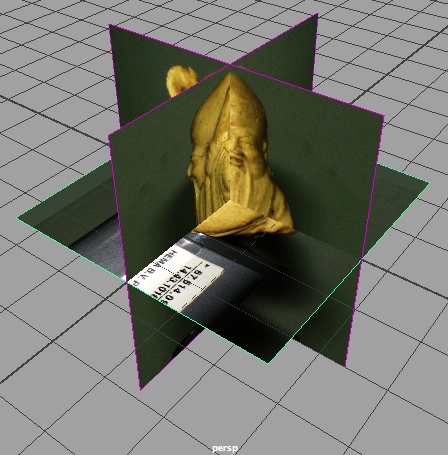
The image planes are all located at the origin and overlapping, that is not very convenient. Let’s move them to from a neat box
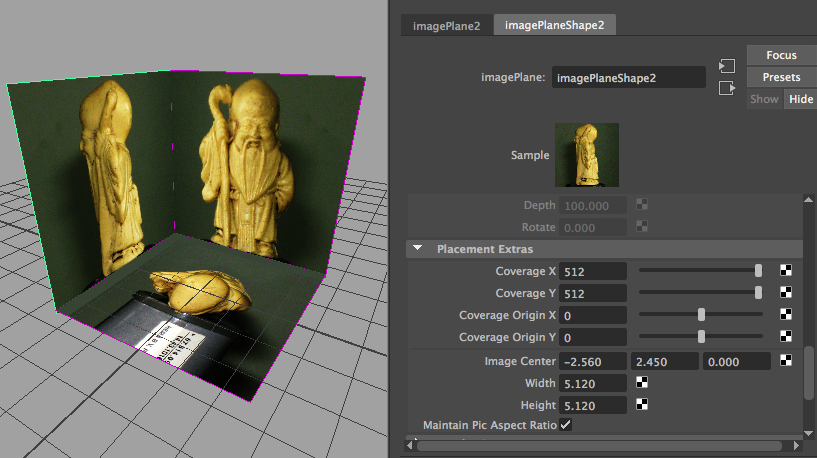
- Select the front image plane (can directly be selected in the viewport)
- Open the attribute editor to view its attributes
- Find the Placement Extra’s section
- Change the Image Center Z parameter (the third one) so that the image is at the back of the two other image planes.
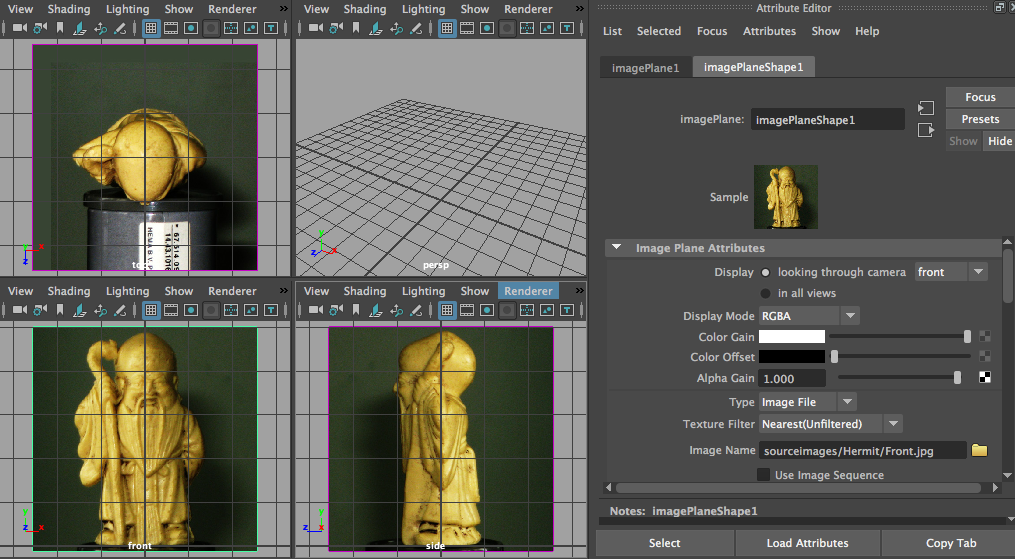
And you are ready to start modeling. At some point these images will be annoyingly in the way. You want to keep them in their respective orthographic view, but you do not need to see them in the perspective view.
- In the imagePlaneShape properties, at the top under Image Plane Attributes, set Display to look through camera [appropriate camera]
Go on to Part 2 of the Hermit Tutorial