If you are rendering elements you want to composite into a background, you need to render the images with a correct alpha or coverage channel. Here are some tips on how to get that.
Please note that 3D renders almost always have a pre-multiplied alpha channel, meaning the transparent portions of the image are (usually) black and semi transparent portion appear darker in the color channels than fully opaque portions. Photoshop transparency is NOT pre-multiplied. If you composite your images in Photoshop, will get dark edges around your objects. You want to use a composing tool, we usually do our compositing in After Effects.
Hiding Objects
Objects that are in your scene, for instance to cast shadows or reflect light, that should not be seen in the render can be hidden from the camera in the shape node by turning off the Primary Visibility.
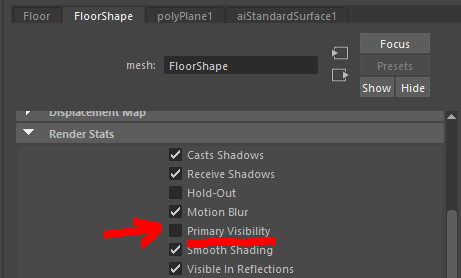
This hides the object from the camera but they will still affect lighting, cast shadows and show up in reflections.

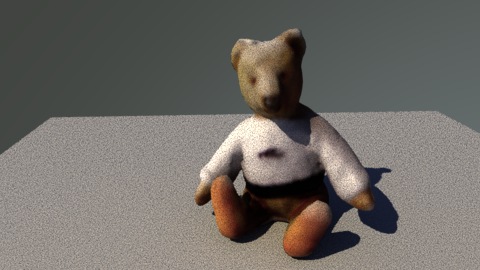
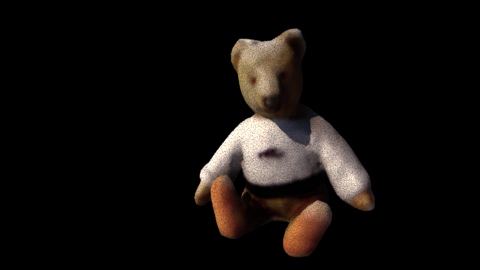
The Alpha channel is still fully white as this scene is lit with a SkyDome (aiSkyDomeLight)
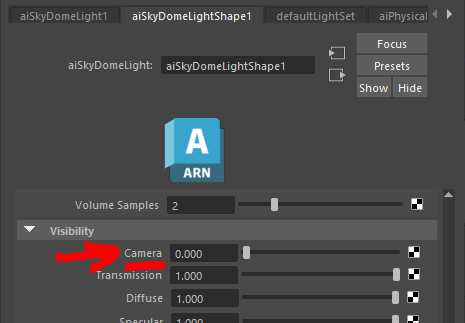
Hiding a Sky Dome
In the shape node of an Sky Dome, you can set the Visibility for the Camera to 0 (zero) to hide the Sky Dome from the render
Now we are left with only the bear. The above image is a JPG, which does not support alpha channels. Here is a PNG:
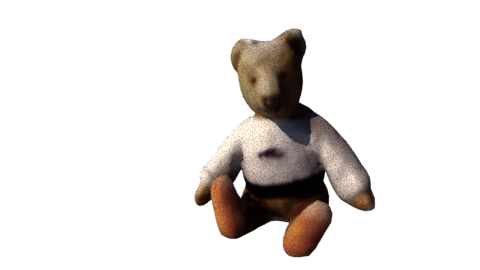
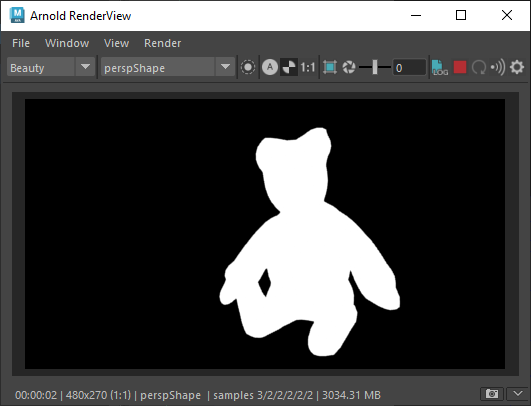
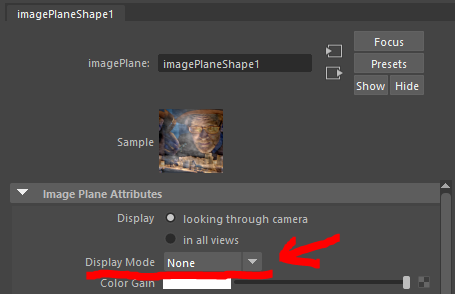
Image Planes
If you are using image planes on your camera, you need to set their Display Mode to None under Image Plane Attributes in the ImagePlaneShape to have them not show up in the render